Sewing: Bring on The Big Floaty Balloon Sleeves

If you are an avid sewer and seek inspiration from Instagram, you may have seen our guest ambassador, Sandy Thao (@thats.sew.sandy) pop up in your feed. Sandy is a self-taught sewist who in her own words says she is still learning, still growing and winging it.
Not sure how true that statement is though, because her end results are flawless and if you love big floaty sleeves then Sandy is your girl. Recently she had full creative freedom to hack our Shell Top pattern with Nerida Hansen Summer Spot in green and true to style, she turned up the volume and added statement sleeves.
Here are her instructions to master the addition of a balloon sleeve.

1. Make the Shell Top as per instructions, but at step 10 sew up the seams of the side of the shirt instead as per original instructions.
2. For balloon sleeves - cut two X large rectangles. The wider the width the bigger the puff! Here Sandy has cut out for her width is 34" and length is 16". Depending on how long or short you want your sleeves you can adjust the length according to your liking.
3. Fold one X rectangle right sides together and straight stitch together. Finish off your edges with a zig zag stitch/overlock. Once you have done that - set up your stitch length to your longest for the shoulder seam. Sew two rows and do not back stitch, keep your ends long. We are going to gather this part.
4. Start gathering like so.

5. Now attach the gather part to the arm hole. Make sure you attach right sides together and spread the gathers to fit your armhole.
6. Sew straight stitch and finish off your edges with an overlocker.
7. This is how it will look like now.
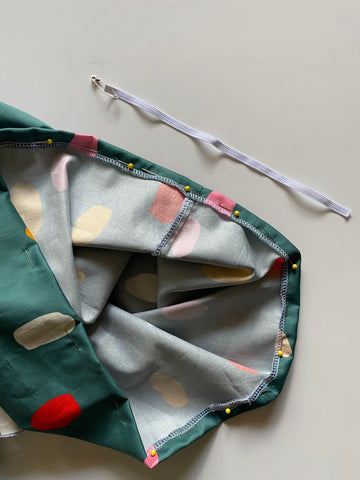
8. Now hem your sleeve up making sure you have left a gap to insert your elastic. For the elastic measure around your arm just above your elbow and include 2cm for seam allowance.
9. Once you have inserted elastic, zig zag to stitch together and close off the opening of the hem.
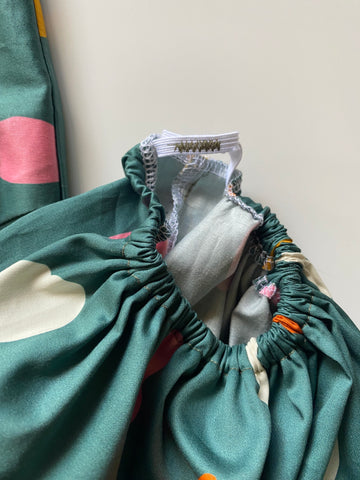
10. You now have your puffy balloon sleeve for your Shell Top. Now do the same for the other side.
11. This is how it should look on the inside.

There you have it! Click here to shop the Shell Top sewing pattern.


