Sewing: For Sure it is Time to Shirr

Shirring and puff sleeves go hand in hand!
Shirring is not new to the fashion scene, but it has definitely made a comeback. With sewing, shirring is the gathering of elastic thread for a decorative feature on a garment. It is usually found on cuffs, yokes or bodices and presents an interesting point of focus.
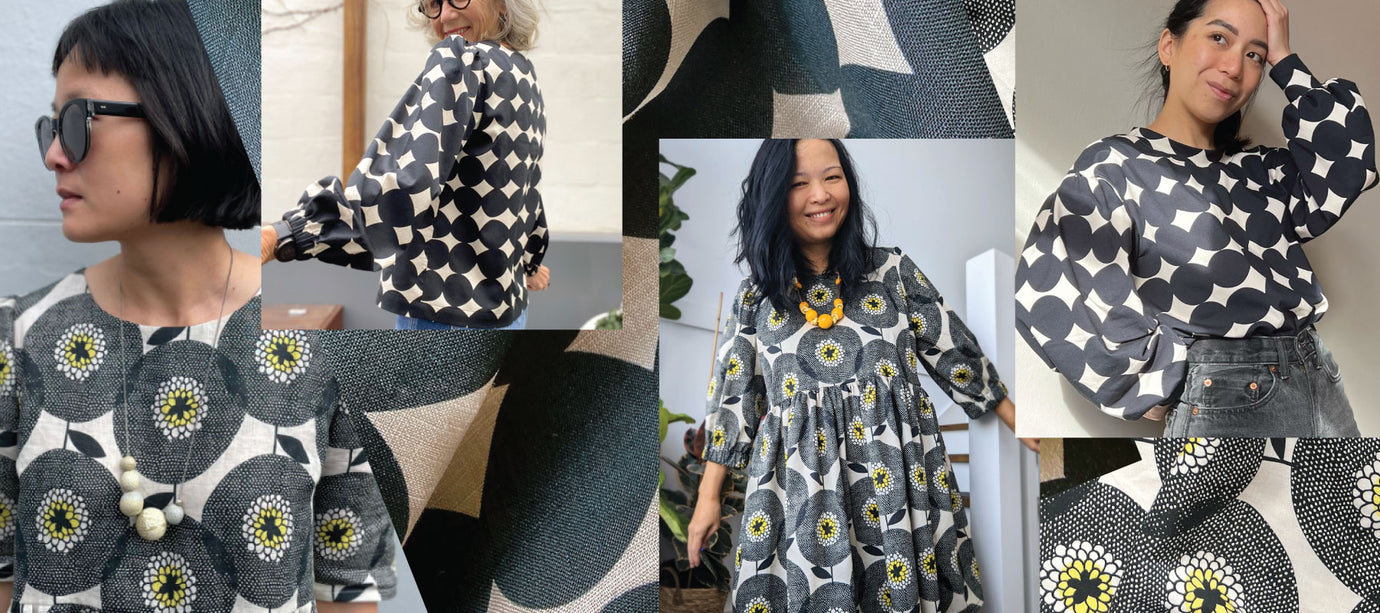
Our hacking superstar, Heather Jameson (@_heathermade) has surpassed the challenge with our Puff Sleeve Blouse sewing pattern and she'll have you shirring in no time.
Heather's instructions:
This blouse feels like a great in-between season weight, in the organic mid-weight cotton. I found that it shirred beautifully, I was a little concerned it may be on the heavier side to be effective, but it worked really well.
This hack involves adding a front slit with facing, as well as extended cuffs and neckline - both of which are finished with a rolled hem on the overlocker. Additional supplies you will need for this hack are two spools of shirring elastic and a tie of your choice (I chose poly cotton bias binding).
- Cut or trace all pattern pieces and lay out on fabric. For now, only cut from fabric the front, back and sleeve pieces.
- Follow instructions for front and back pieces, including darts, shoulders and side seams.
- Take sleeve pieces and “try on” to check the length against your own arm. Measure from the bottom of the sleeve to your desired finishing length - I chose just over my wrist, for a cosy fluted look in my finished cuff.
- Lay your cuff bind pattern piece onto your fabric as a guide and extend the long edge by 25cm - I recommend making a test piece from similar fabric if you can, to take into account your individual wrist size. Take your cuff measurement from the above step and extend the short edge by this amount. As a guide, the measurements for my cuff were 58.5cm x 13cm.
- If you have the ability, finish one long edge of your cuff with a rolled hem - or alternatively, make a very small hem at the cuff.

- Wind your shirring elastic onto an empty bobbin and thread your machine according to your specific model. I set my machine to a stitch length of 3.5mm for the shirring on my sleeves. Stitch at intervals of 6mm to bring your cuff together with a shirred effect. I completed 22 rows, but this will depend on your desired cuff length.
- Take your shirred cuff and find the centre and quarter points - marking with pins. Take your sleeve piece and gather at the cuff end, according to the instructions in Step 11 of the pattern. Keeping in mind that the underarm seam hasn’t been sewn together just yet.

- Pin your shirred cuff across the cuff end of the sleeve, making sure it is evenly distributed. The gathering may need some slight adjustments, but is a good guide to get you started.

- Now sew the underarm seam of sleeve, right sides together, from the shirred cuff, right up to the armpit. This will secure the elastic ends in place. Finish the seam as desired. Repeat for other cuff and sleeve.
- Continue through Step 6 and 7 of the pattern instructions.

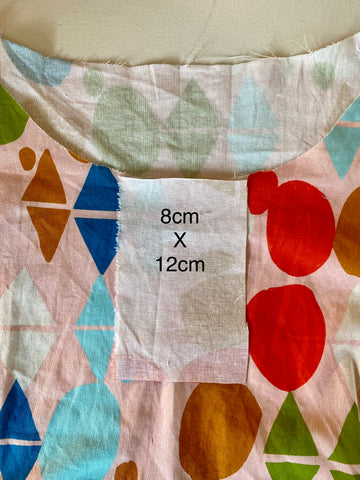


- To make the front slit at the neckline, cut a piece of facing fabric into an 8cm x 12cm rectangle. Find the centre point of the neckline and mark down 10cm down from neckline with chalk. Fold the facing in half and press a line down the centre to use as a guide. Lay the facing, right sides together, lining up centres. Mark 0.5cm on either side of the centre line with a fabric marker and then make a mark at 8cm from the neckline. Line up the points on either side of the centre with the 10cm mark to form a triangle guide for stitching. Stitch down to the tip of the triangle, pivot and stitch one thread across, then pivot again and stitch up the other side of the triangle to the neckline. Very carefully, cut down the centre line right up to the point of the triangle. Finish the edges of the facing and turn the facing towards the inside of the top - press well.
- To allow the shirred neckline to spread nicely, make two rows of gathering stitches from the slit to the shoulder on either side of the front piece. Gather to approximately 12.5cm and secure by tying knots in the gathering threads.
- To make the shirred neckline piece, I cut a 5cm strip from the entire width of the fabric (in this case 137cm), minus the selvedges. You may wish to try your blouse on and measure your desired height for your neckline. I finished the top edge with a rolled hem as before with the cuffs and sewed five rows of shirring at 6mm intervals.

- Once you have your shirred neck piece, take your front ties (at a length of approx 50cm) and attach to the centre point of each end of your neck opening with a few stitches. Hem these ends by folding 1cm into the wrong side and stitch. You may wish to secure your ties at the very edge of the neckline so they don’t pull the wrong side once tied up.

- As per cuff instructions, find centre and quarter points of the shirred neck piece. Starting at the centre back, line up the centre of the neck piece, right sides together and continue to distribute around to the split opening. Stitch in place and finish as desired.
- Finally, hem the bottom of the blouse at your desired length and enjoy!

Previous article

Next article