Sewing: Fresh Look to the Nerida Hansen Smock Dress

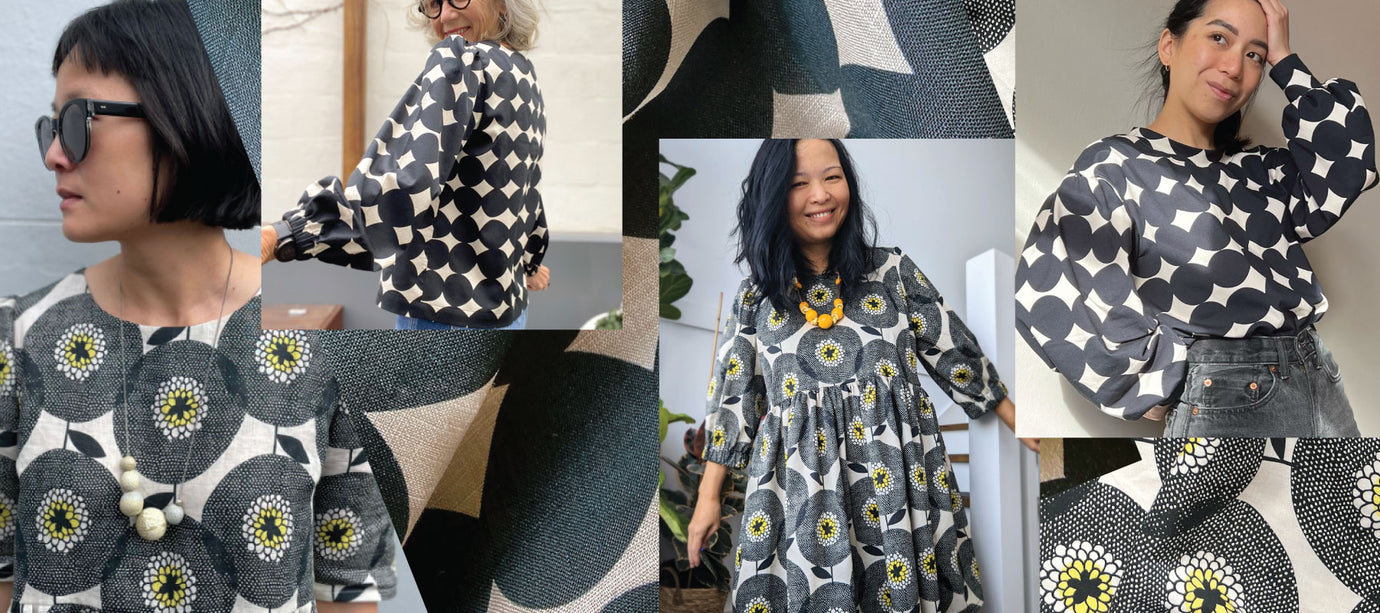
Katie walks us through her version of the Nerida Hansen Smock Dress.
For this version I shortened the sleeves and made them larger, shortened the bodice and skirt and added a ruffle. The sleeves were shortened four inches, then I sewed a casing for elastic instead of a cuff. I shortened the bodice by 2.5 inches, the skirt to a total of 19 inches and the ruffle is nine inches long.
Extra supplies you’ll need:
- Tracing paper to draft your new sleeve
- Pen
- Tape
- Narrow elastic for sleeves
- Extra fabric for the frill, it should be 1.5 - 2 times the width of the skirt pieces. For mine, I used four rectangles, the full width of fabric by nine inches long. Two pieces for the front skirt and two pieces for the back skirt.
I cut the pieces to the new measurements and interfaced the facing pieces. I also stay stitched the front and back necklines to prevent them from stretching.
- Take the front bodice piece, sew the darts and press them down. For a nice neat dart, stitch off the edge of the fabric beyond the dart point, cut the threads and tie off rather than back stitch.


- Sew front and back bodice pieces together at the shoulder seams and side seams. Finish the raw edges with your preferred method, I’ll be using an overlocker but you can use a zig zag stitch or pinking shears.

- Sewing the front and back facing pieces together at the shoulder and finish the raw edge.

- Pin the facing to the neckline, right sides together. Sew then clip into the seam allowance or use pinking shears to reduce the bulk.


- Understitch the seam allowance of the neckline and facing to the facing pieces.

- You can also stitch in the ditch at the shoulder seams, from the right side of the bodice, which helps keep the facing in place.

- If you’re going to use elastic in your sleeves, take your sleeve pieces and press the hem up twice. It is far easier to have a narrow hem than a widehem on a curved pattern piece. Make sure your hem width allows for the elastic you will be using. It is much easier to press the hem now before the sleeve side seams are sewn.

- Open up the creases you’ve just pressed at the hem and sew the side seams of the sleeve and finish the seam allowances.

- Using a longer stitch length, baste two rows of gathering stitch along the sleeves - one within the seam allowance and one outside the seam allowance.
- Fold the hems along the creases you pressed earlier and stitch in place, leaving a gap to add elastic later.
- Pin the sleeves into the bodice, right sides together and gather the sleeve to fit. Sew into place and finish the raw edges.

- That’s the bodice done for now! Put it aside and find your pocket and skirt pieces.

- I find it a bit tricky to use the overlocker after the pockets are attached to the skirt, so I overlock first and stitch after.
- Overlock the curved edges of your four pocket pieces, leaving the straight edge raw.

- Pin your pocket pieces to the skirt pieces, right sides together and matching notches.
- Overlock the pocket pieces in place, from the top of the skirt to the bottom. Line up your overlocker with the edge of the fabric, making sure you only take a sliver of fabric off at the raw edge.

- Then place the skirt front and back pieces right sides together, matching pockets and stitch from the top of the skirt, around the curved pocket piece and down to the bottom of the skirt piece.

- Baste two rows of gathering stitches along the top and back of the skirt pieces, one within the seam allowance and one outside the seam allowance.

- Pin the skirt to the bodice, matching side seams and notches and gather the skirt to fit. Adjust the gathers so they are neat and even.
- Carefully overlock the raw edge of the bodice and skirt seam.

- Find the centre front and centre back on your skirt pieces at the hem and snip a small notch in them. This is so you can centre your frill pieces evenly onto the skirt.
- Take your frill pieces and sew them together, forming a big loop and finish the raw edges at the side seams.
- Press up the raw edge twice to form the hem and sew in place. I find it easier to finish the hem now, rather than when it’s attached to the dress.

- Baste two rows of gathering stitch, one within the seam allowance and one outside the seam allowance across the top raw edge of the frill. I do this in two parts, one lot of gathering stitch for the front of the frill and one for the back, it’s easier to control the gathers this way on such a long length of fabric.
- Gather your frill and match the side seams and centre fronts and backs with the skirt pieces. Pin in place and adjust gathers so they’re even.
- Sew in place and overlock the raw edge to finish.

- Wrap some elastic around your arm to determine the correct length for your sleeves.
- Using a safety pin, thread the elastic through the casing you made in the sleeves earlier. Don’t lose the end! Overlap the ends, making sure the elastic isn’t twisted and sew across the ends to secure.

- Tuck the elastic inside the casing and sew across the gap you left in the casing earlier.
- That’s it! All done. Time to take your breezy new dress for a spin.

Previous article

Sewing: Let's Give That Sleeve Some Puff